Apache Ant is currently in version 1.6.5 (released on June 2, 2005). I have used Ant since the 1.1.x days and I must say that I fell in love with Ant the day I first downloaded and played with it. And the love endures till this day  I remember voting for the official Ant logo in August/September 2001. See the post by Christoph Wilhelms about the vote. And the voting results here. I was a part of the ant-user & ant-dev mailing lists at that time and I had voted for the logo that won!!!
Anyway, enough nostalgia. Lets talk about Ant…
What is Ant?
First of all, what is Ant? As the Ant developers say – Ant is a Java-based build tool. Okay. So what you say? Well, Ant is a tool that makes it possible to do routine stuff in a easy, repeatable, & robust way. Once you have mastered the Ant concepts, how to write Ant scripts (XML files) and how to make use of the power of Ant, you will be left wondering how you managed all those tasks before Ant came along! In fact, I use Ant for a variety of tasks, over and above the software development related tasks that it is meant for. For example, I use Ant to generate a search index for this blog and FTP it to the server everytime I make a post. I use Ant programatically (no build.xml file) in a lot of my programs where I need common functions like file copy, ftp, etc. Why reinvent the wheel when Ant is available?
Installing & Using Ant
Installing Ant is a breeze. Just download the latest binaries from the Ant web site. You should download the ZIP archive. Unzip the archive to a convenient folder (I use D:\Java\apache-ant-1.6.5). You will end up with a folder like in the screen shot below:
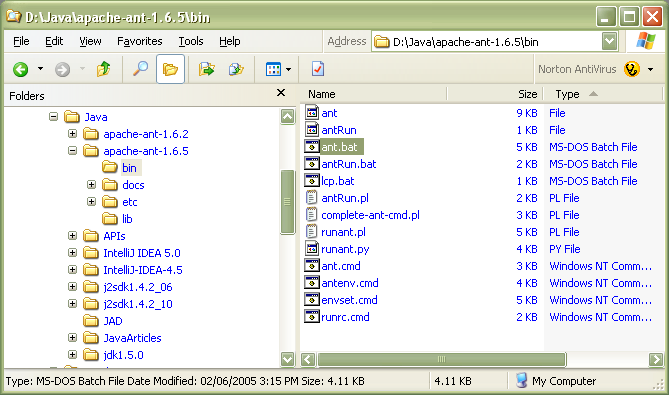
Figure 1. Apache Ant – Folder Structure
Note that I have highlighted the bin folder. This has MS Dos Batch files that you can use to run Ant. We dn’t have to worry about the batch files and the commands they contain at this time. I will go over some of that stuff in a later post because there are a couple of points that relate to extending Ant with third party Ant Tasks etc.
To run Ant, we need to do two things:
- Set the ANT_HOME Environment Variable – This will point to the root folder of your Ant installation. D:\Java\apache-ant-1.6.5 in the case of the screen shot above.
- Add the Ant BIN folder to the System Path – Add the BIN folder to you path. D:\Java\apache-ant-1.6.5\bin in the case of the screen shot above.
That’s all you need to do to get Ant installed and running.
To test your Ant installation, open a MS-DOS command prompt, change to any folder of your choice (say D:\) and type ant.bat.You will see something like the stuff below (figure 2).
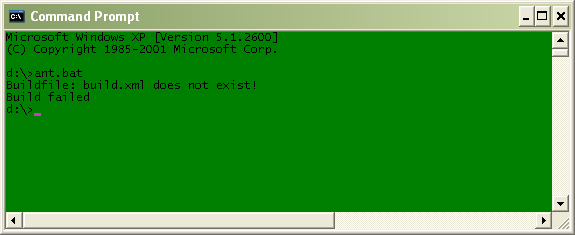
Figure 2. Apache Ant – The First Test Run
This proves that Ant has been properly installed and all the settings we need are in place. We can now test Ant with a simple build file (we will cover build files in more detail in subsequent posts).
A Simple Build File:
Lets write a simple build file and test our Ant installation. At this time, just download this file (right click and select Save As) and save it into a suitable folder (say D:\AntTest\). Open a MS Dos command window and change into the folder in which you placed the build.xml file (say d:\AntTest\). Type ant -verbose in the command prompt. You should see something like the screen shot below:
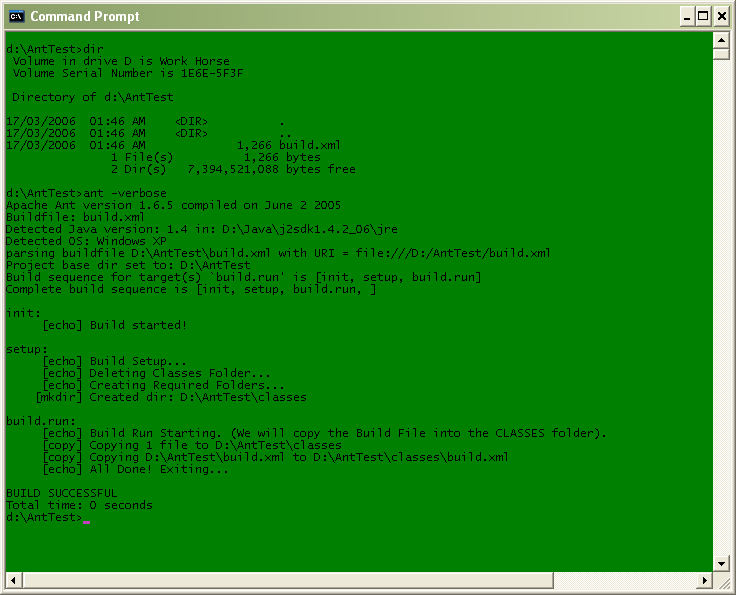
Figure 3. Apache Ant – First Run Results
Okay, what did we do here? First of all we told Ant to delete the classes folder under the root folder (D:\AntTest\ in this case). Note that the classes folder did not exist at this time. However Ant can handle situations like that! Next we tell Ant to create a new classes folder under the root folder. After that we told Ant to copy our build file, build.xml, from the root folder to the classes folder. That’s it! Short and sweet but it demonstrates that our Ant installation works.
The screen shot below shows the D:\AntTest\ folder contents after the test run.
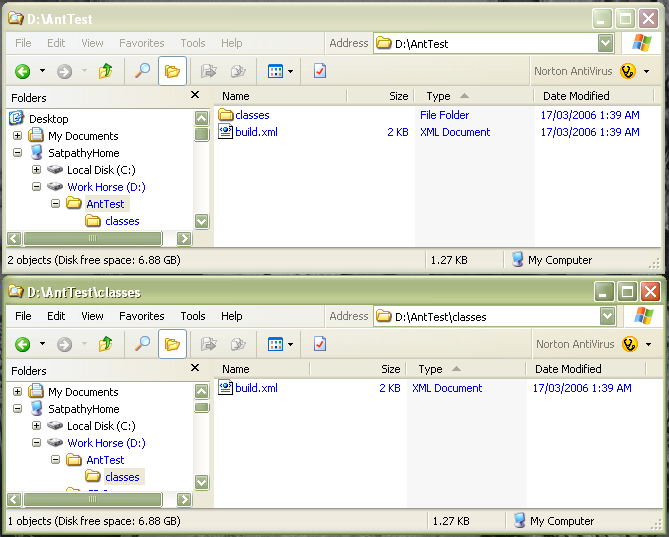
Figure 4. Apache Ant – Test folder contents after first test run
Well, we now have a working Apache Ant installation and have actually executed a build using Ant. Next we will look at some Ant concepts and how to write good build files.
NEXT – Ant Concepts, Build Files.
